Thursday, October 31, 2013

easy sloppy joes

Who doesn't like a sloppy joe? I mean, really. They are savory, tangy, and can be customized to whatever mood you are in that night- these ones are slightly spicy and a little twangy.
Like usual, I chose to use ground turkey instead of ground beef- but you can use whatever you want.
Once the ground meat has been fully cooked, add in your veggies. I've used everything from black olives, green olives, carrots and even very finely chopped broccoli in my sloppy joes, but this is more classic. Just diced onion, garlic and a small jalapeno!
Now for the seasonings! No need for a packet here! Ketchup, of course for the tang, tomato sauce for some richness and tartness, chili powder for deep color and flavor, mustard powder for more tang, cayenne pepper for spice, paprika for color and taste, Worcestershire sauce for deep flavor, salt and pepper of course, and then honey to cut all the savory flavors! Add just a quarter cup of hot water and mix it all up!
Perfect. Thick and tangy, slightly spicy and ready for a bun!
Easy Sloppy Joes
1 lb ground turkey
1/2 cup diced onion
2 cloves garlic, minced
1 jalapeno pepper, minced with seeds and ribs removed
3/4 cup ketchup
3/4 cup tomato sauce
2 Tablespoons honey
1/4 cup water
1 Tablespoon chili powder
1 Tablespoon Worcestershire sauce
1 teaspoon mustard powder
1 teaspoon cayenne pepper
1 teaspoon paprika
Salt and pepper, to taste
Kaiser rolls, toasted

In a large skillet, brown ground turkey until no longer pink. Add in diced onion, garlic and jalapeno pepper and cook 5 minutes, or until the vegetables are soft. Add in ketchup, tomato sauce, honey, water, chili powder, Worcestershire sauce, mustard powder, cayenne pepper, paprika and salt and pepper. Cook for an additional 10 minutes or until thick and hot. Serve on toasted kaiser rolls and enjoy!

Wednesday, October 30, 2013

roast beef crescents

I've been posting a lot of roll ups lately. A lot. First the Giant Pigs in a Blanket. Then, the Stromboli Roll Ups. Now, these. What a strange coincidence. I definitely didn't plan it. But, a delicious coincidence none the less.
Link certainly doesn't mind all the roll ups!
These are beyond easy. There only like, 4 steps. The first step is to lay out the crescent.
Step 2 is to lay out a few slices of thinly sliced deli roast beef on top of the crescent.
Next, step number 3, is to add a chunk of cheese. This is mozzarella, but you can use Swiss or provolone... what ever you have around.
Step 4 is to roll it up! And then, repeat and repeat until all the crescents and all the meat are gone.
What a beautiful sight. These go into the oven at 350 degrees for 20 minutes, or until they are brown and perfect.
Ah ha, ah ha. Very nice. These are good as they are, dipped into a little horseradish, or even into au jus. No drippings? No problems- just check out my how to on making Au Jus from Scratch!
Roast Beef Crescents
1 lb deli roast beef, sliced thin
4 oz. mozzarella cheese, cut into 8 chunks
1 package refrigerator crescents

Preheat oven to 350 degrees. Lay out a single crescent and top with 2 slices of roast beef. Place a chunk of cheese at the wider end of the crescent and roll up, with the skinnier end out. Repeat until all the crescents are gone. Place on a lightly greased baking pan and place in preheated oven. Bake for 20 minutes, or until crescents are browned and golden. Serve with au jus and enjoy!

Tuesday, October 29, 2013

salt & vinegar pumpkin seeds

Happy Halloween! I tried to avoid all the pumpkin posts, and the orange and black... but I caved. At the last minute. Hope you don't mind. Here's a spin on the classic pumpkin seed; trust me. They are awesome! Scary awesome (forgive me).
Here's how I rock my pumpkin. I cut the top off the pumpkin using a VERY sharp knife, the level it off with one more slice. That'll get all those seeds on the lid off into the bowl.
Next! Wield your weapon. I start with a wooden spoon and I swirl it around inside to loosen everything up.
Now for the heavy artillery! Use the metal spatula or scraper to really get all the gunk out.
Once the pumpkin is cleared of that stuff, you should have a big ol' bowl of guts and seeds. Proceed in carving the pumpkin however you choose.
This will take a while... but you gotta sort through all the guts and get the seeds out. And these little guys are slippery buggers. They'll pop right of your hands and onto the floor before you know it. And that distinctive plunk on the floor will bring all your dogs running, and maybe later you'll find a half eaten seed on the bed. Like I did.
Fun fact! Pumpkin seeds float! Pumpkin guts don't. That makes this process at least a little easier. Dump the sorted seeds into a big bowl, pour in some water and start rubbing them between your palms to get the extra pumpkin guts off.
There we are. Prepare the flavor infuser.
The flavor infuser would be the boiling process. In straight vinegar with a dash of salt. Believe me. It may smell funky, but it's worth it. This will boil for about 10 minutes. Meanwhile, this is a good time to preheat your oven.
Drain, drizzle with olive oil, and of course, more salt. It's not called Salt and Vinegar for nothing! 25 minutes later, after a spell in a 400 degree oven, you'll have some little yummies on your hands! And now you only have to wait another whole year for more.
Salt & Vinegar Pumpkin Seeds
1 pumpkin's worth seeds, cleaned and drained
2 cups distilled white vinegar
1 Tablespoon salt
Kosher salt
Olive oil, for drizzling

Preheat oven to 400 degrees. Boil vinegar with 1 tablespoon of salt over medium high heat, and add in pumpkin seeds. Boil for 10 minutes. Drain and dry with a paper towel. Spread in a thin layer on a baking pan and season with olive oil and kosher salt. Bake in oven for 25 minutes, stirring seeds frequently to ensure even browning. Remove from oven and allow to cool before storing in a zip top bag. Enjoy!

Monday, October 28, 2013

spicy thai noodles

So I've done this recipe before on The Dog Mom, but I made a vegetarian version for dinner and wanted to share it with you. Now, I didn't add any vegetables (mostly because it's the day before I go grocery shopping and I have no fresh vegetables) but also because it's hearty enough to not need a lot of filler. This, therefore, is just another version of those noodles I posted almost 6 months ago!
This time, the sauce includes OF COURSE peanut butter and soy sauce, but also some red pepper flake, sesame seeds, vegetable oil and sriracha sauce.
All shook up!
Meanwhile, we decided to let Link have the very last remains of the peanut butter in the jar. He approved of that!

And we are already in the home stretch.. now the cooked noodles are added into the mix!
Poured into the is the peanut butter soy sauce mixture and then this is heated through.
Because this sauce has oil in it, you can even go so far as to crisp up the sauce by letting it sit for a minute and sizzle on the bottom before turning- you'll get almost a fried texture to some of the noodles and that is awesome!
Spicy Thai Noodles
1/2 lb spaghetti noodles
1/8 cup vegetable oil
2 Tbsp peanut butter
4 Tbsp low sodium soy sauce
1 Tbsp Sriracha sauce
1/2 tsp crushed chili peppers
1/2 tsp sesame seeds

Boil pasta and drain thoroughly.Mix the oil, peanut butter, soy sauce, sesame seeds, Sriracha and crushed chili in a small bowl or Mason jar. Combine noodles and sauce mixture in the pot and toss to combine. Sauce with thicken up and coat noodles as the peanut butter melts. Serve hot or cold and enjoy!

Saturday, October 26, 2013

vanilla bean scones

So my new obsession is World Market. I want one of everything in that store. Plates, bowls, silverware, wine, food, clothing. Give me it all. Please. One of my favorite parts of that store are the spices, because they are so cheap and you don't get a huge amount, so I can buy a small container of something I don't use very often, like saffron, and not pay $20 bucks for a big container and worry about it hanging out in the cabinet for 6 months. Same deal with the vanilla bean- just $2.99 for 2 beans and that's all I needed!
Vanilla on it's own is nutty, slightly bitter and not sweet at all. Vanilla extract tasted without sugar is nasty- very bitter. But it all smells divine. I read an article that said that the one scent that almost every man finds attractive and alluring (more than those expensive perfumes that women buy) is vanilla. Maybe us ladies should just start dabbing a little vanilla behind our ears and calling it a day.
This is what you want out of those little beans- the caviar. Just slice the beans down the middle, and using the backside of the knife, scrape out all the good stuff. You'll need one bean for the scones and one bean for the glaze.
You'll want to infuse the cream for the scones with the vanilla caviar for about 15 minutes, and that'll give you time to do something I dread.
Ugh. I HATE sifting. I hate it. HATE it. I need the kind of sifter that my Mom has, with the crank on the side, because this way is just sooooo drawn out. It takes like 5 minutes for me to sift with this kind of sifter. But it's what must be done, and it's worth it.
Okay, now that the worst is over, it's time for some cutting. This takes a while, so be patient. But, you want to keep cutting the butter until it's in fine crumbles.
Keep cutting. Keep cutting. Just a little more.
There we go. You can keep going if you'd like, but I got impatient. This will make a pretty flaky dough.
Alright, now in goes the vanilla infused cream and time to mix.
Mix this until it just comes together.
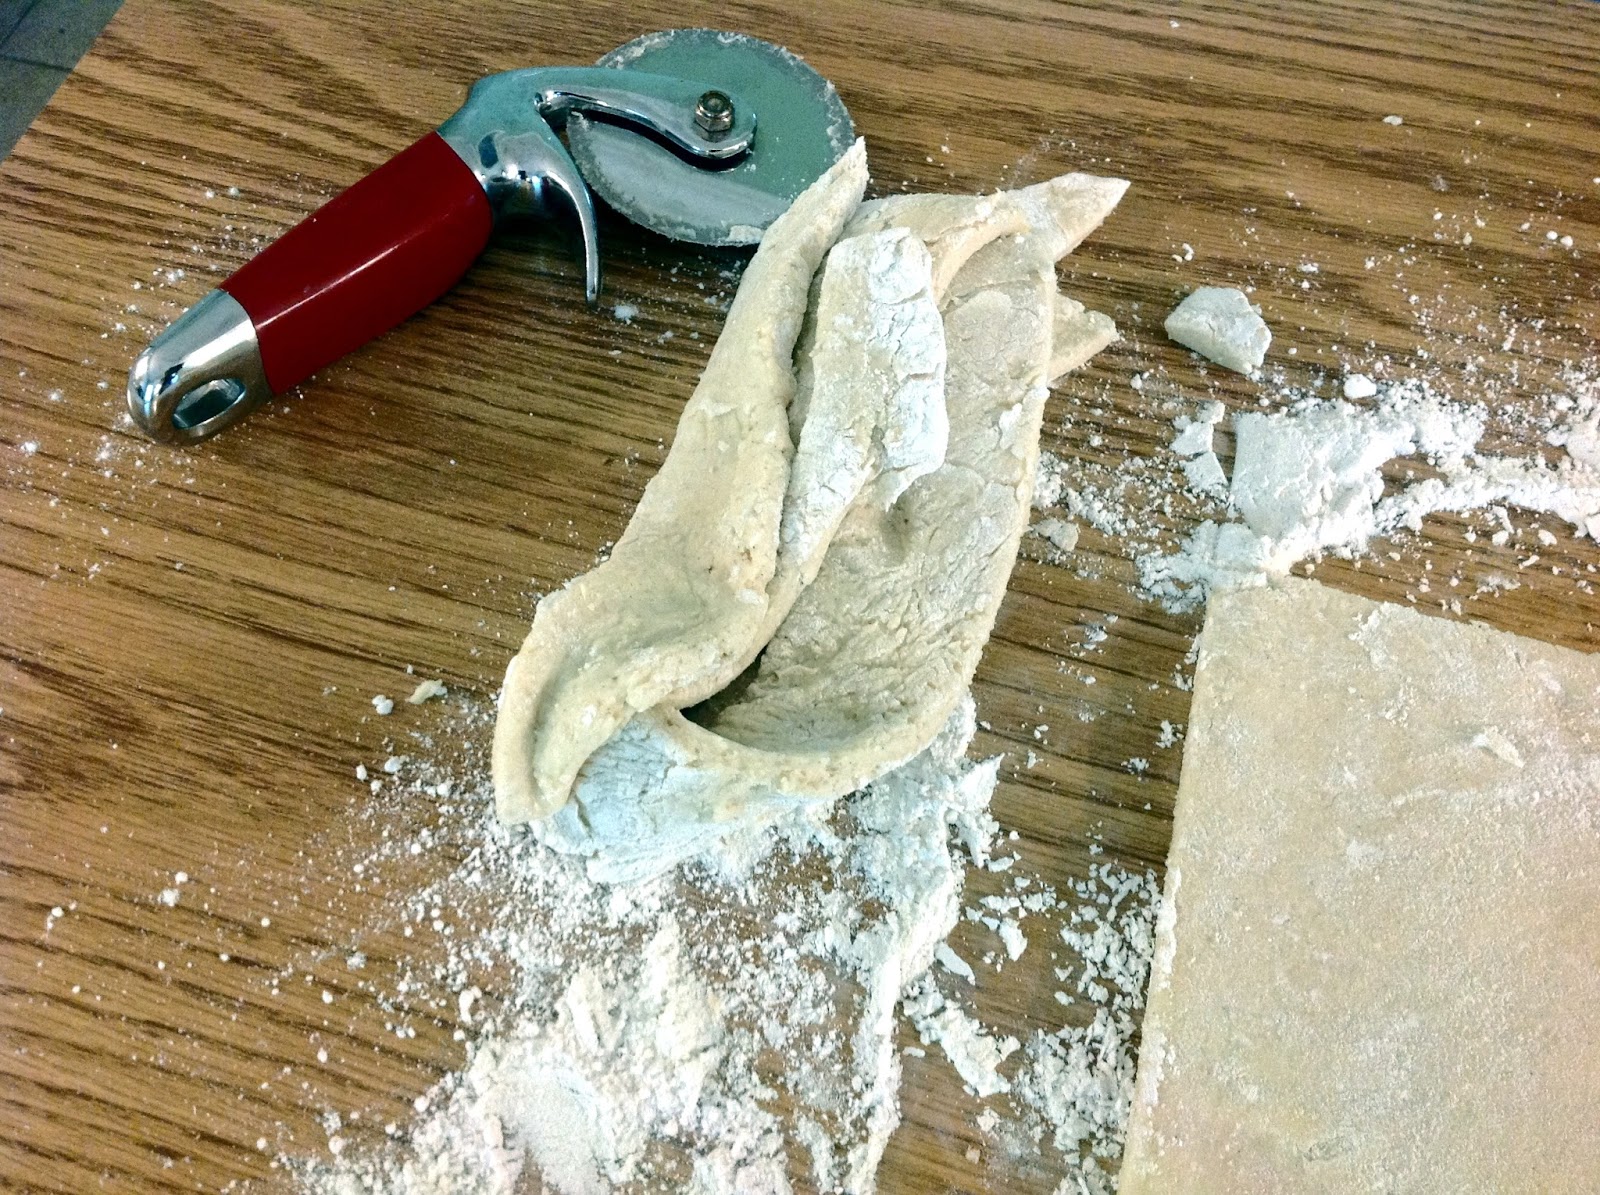
Alrighty, turn that out onto a very well floured working surface, and be sure to use a well floured rolling pin as well.
Roll that out into a rectangle for slicing.
Okay, and just so you don't think that I'm like so kind of rolling whiz, I used the pizza cutter to make a perfect rectangle. Just for the sake of full disclosure.
Step one for slicing is 4 equal vertical slices.
Step 2 is to slice one right down the middle lengthwise, and step 3 is to cut each little section into triangles. Once the whole thing is sliced up, transfer onto a baking sheet.
Parchment paper helps it not to stick. 15 to 18 minutes later, take 'em out of the oven and they should be just golden brown.
Goregous! Let them cool, completely. While they are cooling, you can start on the glaze.
More milk that's been infused with the vanilla bean caviar starts the glaze. Or, I guess I should say it ends the glaze. Pour this milk into 5 cups of powdered sugar and mix it up!
Dunk each one of those lovely little cooled scones into the glaze and transfer onto a baking rack.
It's a thing of beauty, right there.
Keep going until the are all covered. The glaze will firm up, and all these need is a big cup of coffee to be dunked in. Oh yes.
Vanilla Bean Scones
More good stuff from The Pioneer Woman.
3 cups all purpose flour
2/3 cup sugar
5 teaspoons baking powder
1/2 teaspoon salt
2 sticks butter, chilled
1 large egg
3/4 cup heavy cream
2 whole vanilla beans
5 cups powdered sugar
1/2 cup milk

Preheat oven to 350 degrees. Slice one vanilla bean down the middle and scrape out caviar with the back of a knife. Transfer caviar into a measuring cup with heavy cream. Let steep for 15 minutes. Meanwhile, sift together flour, sugar, salt and baking powder. Add in butter cut into cubes. Cut butter into flour using a pastry knife until in fine crumbles. Crack egg into steeped cream and caviar and whisk to combine. Pour cream into sifted flour mixture and stir to just combined. Turn dough onto a well floured surface and roll to a 1/2 inch thickness. Using a pizza cutter, cut into a rectangle. Slice the rectangle into four vertical portions, one slice down the middle, and then each section into a triangle. Transfer each triangle onto a baking sheet lined with parchment paper. Bake in preheated oven for 15 to 18 minutes, until the scones are just browned and golden. Transfer onto a cooling rack and allow to cool completely. While scones are cooling, slice remaining vanilla bean in half and scrape out caviar. Steep caviar in milk for 10 minutes. Transfer milk into powdered sugar and stir to combine. Dunk each cooled scone into the glaze and place back onto rack. Let glaze firm up and enjoy!